Exclusive Content:

How to Climb Hills with Ease on a Mountain Bike

Bicycle Hill Climbing Technique Tips for Off Road Cycle...

Single Speed 29er Mountain Bikes

Why 29 Inch Wheels are Good for Fixed Gear...

Yoga Stretching for Cyclists

Yoga Exercises Help Cyclists Maintain Flexibility in Tight Muscles Yoga...
Home Blog

Why Winter Training?

Why Winter Training?

Get a Leg Up On Bike Racing

Don’t let those other guys beat you in the race. Start your bike racing training in the winter and see how much better you do this year.

All summer long you train and work your butt off six days a week so you can win at the big race or so you can win as many races as possible. You got out there in the spring and trained almost every day. You went on long bike rides, did a lot of hills and tried to be faster than all your cycling friends. Then the day of the big race comes and you discover that it just wasn’t good enough.

Sure racing season starts in the spring, however, if you began your training by sitting around the home all winter, your competitor already has the upper hand. I’m not saying that you need to work hard all year – you’d burn yourself out if you did – but you still need to keep in shape.

Get out on your bike at least once a week if possible, twice is better. I know a lot of us don’t want to go out cycling when it’s cold. For those days get on your trainer at home. Try to complete at least one hour every session.

Weight training can be a benefit to a cyclist if it is done the right way, perhaps two or three times per week. Find a personal trainer or coach that knows how to train a cyclist in the gym. Do it right and your speed will increase, do it wrong and you will suffer.

While I’m on the topic of weight training, train your upper body too, not just your legs. Your upper body will help you steer your bike around corners easier and push your bike forward so you can go faster. Personality-wise, it will make you look better. You don’t want to have large legs and a small chest with scrawny arms. Make yourself look more even.

Be careful when you are weight training that you don’t put on too much weight. You struggle to make sure your bike and equipment are as light as can be, don’t add extra weight by making yourself weigh more. Also, don’t forget to stretch. As you build muscle your muscles become tight and you become less flexible. This can cause you to pull muscles and tendons during a race. Stretching is an essential component of a well-rounded exercise.

Make sure your personal trainer or coach understands what you want before starting your training. You may only need to hire someone for a few months over the winter, Both to instruct you on the necessary tasks and to keep you motivated. Having someone else watching over your training means you are likely to go more often.

Summarize : Why Winter Training?

If you’ve been sitting around the home all winter, your competitor already has the upper hand. I’m not saying that you need to work hard all year – you’d burn yourself out if you did – but you still need to keep in shape. Start bike racing training in the winter and see how much better you do this year. Find a personal trainer or coach that knows how to train a cyclist in the gym. Weight training can be a benefit to a cyclist if it is done the right way, perhaps two or three times per week. Make sure your bike and equipment are as light as can be, don’t add extra weight.
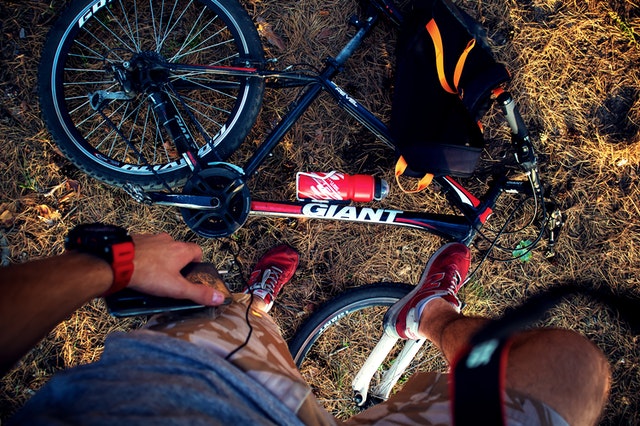
Basics of Hydration for Cycling

Basics of Hydration for Cycling

Drinking sensibly for performance, comfort and health

Exploring the importance of hydration for recreational cycling as well as racing. Looking at reasons to drink sensibly, and what to drink.

Back in the 1960’s, it was common for riders in races like the Tour de France to stop off at roadside bars for a glass of wine or something stronger. This seems hardly believable now, but there were some marathon stages in those days and a more laid-back attitude prevailed, at least in the early part of a long hot day. The death of Tom Simpson in the ‘67 Tour is generally blamed on a cocktail of amphetamines and cognac (for more on this see his biography, in the Top Ten Cycling Books article).

Sports science hardly existed in those days. Today, there is much better understanding of proper nutrition and, specifically, proper hydration. This is vital for endurance racers, but should not be neglected by anyone setting out on longer rides – certainly if you will be riding for more than a couple of hours, even at a moderate pace, hydration is important.

Put it another way: de-hydration can have all sorts of unpleasant consequences. Cramp is the most obvious, and real heat exhaustion can follow, which can even be life-threatening. But dehydration can impair concentration or judgement, which could also be life-threatening on a tricky mountain bike trail or if you’re riding among traffic.

Low-level, sub-critical dehydration may not cause any obvious symptoms, but it still makes riding less comfortable, less efficient, and less fun. If you tend to gulp down several glasses of water or soft drinks at the end of a ride, you’ve probably reached this point.

What to drink?

Plain water is good, up to a point: it’s certainly loads better than nothing. When exercising you lose fluid partly through breathing and partly through sweating. What you breathe out is mostly water vapour but sweat contains chemicals, often referred to as salts or electrolytes, which also need to be replaced. The more you sweat, the more important this becomes. This is where special electrolyte drinks come in; these are designed to match the chemical balance of what you lose. However these are expensive and for the average rider, as opposed to the marathon competitor, may be overkill anyway.

Commercial soft drinks are usually loaded with sugar – something you don’t need so urgently for most rides – and generally do little to replenish electrolyte levels. Some – especially so-called ‘energy’ drinks – also contain caffeine. Caffeine makes you go to the bathroom, so it doesn’t help you stay hydrated.

Dilute fruit juices are an economical and healthy choice. If it’s hot, you could add a little common salt. The operative phrase is ‘a little’. Remember that the total recommended daily intake of salt is just 6 grams (about 1 teaspoonful), though this is a guideline for sedentary people. Those who are taking a lot of exercise, particularly if they sweat heavily, can use more. But even so, the quantities needed are small, just a couple of milligrams per litre, so drinks should not taste obviously salty.

Alcohol also promotes dehydration – after all, that’s most of what a hangover is. Tea and coffee are not particularly helpful either as they are also diuretics. Coffee is probably worse than tea in this respect, though it’s hard to make comparisons as strengths vary and coffee is often drunk in smaller volumes.

This is not to say that you can’t have a ‘cuppa’ or even a beer at a stop during a ride: just think of it as extra to your basic hydration needs, not a replacement. During long rides, especially if it’s hot or you’re pushing yourself, it is certainly wise to avoid strong drinks or excessive consumption of coffee.

Cycling 100 Miles in a Day: A Complete Guide

Cycling 100 Miles in a Day

Cyle a Century with the Proper Training, Diet and Attitude

Bicycling 100 miles in just 24 hours is do-able. You just need to know how. This article provides an overview for dedicated cyclists looking to push themselves further.

There are varying views about riding a bicycle 100 miles in one day. One view is “impossible.” Another opinion is “insanity.” But you can do it. Here is how.

Ride a lot, ride right.

In order to ride 100 miles, you must ride your bicycle. And not just the day of the century ride. Some riders say, “Oh, I can do it even though I haven’t ridden. I’ll just go slow.” This is a poor decision since you will not enjoy the ride, you’ll likely be doing it alone and finishing hours behind everyone else and you can cause your body real harm. The better practice is to actually train for the ride.

Your training can vary depending upon how many days you have before the day of the century ride and how well you want to perform. The training schedule set forth below is meant as a baseline from which you can either ratchet up or ratchet down (but not too much) to prepare for your century. As a general rule, you can ride three times as far as you feel comfortable riding (for example 33 miles x 3 = 99 miles). You can be more aggressive by doing intervals if you are seeking a quicker century.

  • Monday Off or easy 10
  • Tuesday Pace 20
  • Wednesday Easy 15
  • Thursday Moderate 20
  • Friday Easy 10
  • Saturday Moderate 30 (longer ride for the week)
  • Sunday Easy 15

As your conditioning improves begin to ride 6 days a week and increase mileage. Get some friends and ride for an hour before lunch. Increase total mileage until week before the ride. The week before return to this level with your longer ride being the Day of the Century

Eat and drink a lot, but do it the right way. 

In order to have the energy to complete a century ride, and in order to not dehydrate, you need to eat and drink a lot of the right stuff. A rider in a recent century had a tuna fish sandwich and chocolate milk before he hopped onto his bike. Obviously, nobody wanted to ride behind him. Energy bars, bananas and raisons are good foods to keep you going and should be eaten every half hour for a century ride. Drinks should be energy drinks as well, however, they can be watered down or you can carry two water bottles, one with water and one with an energy drink. The electrolytes that you will lose during a long ride need to be replaced. On hot days you should drink every 15 minutes.

Have an attitude, the right one.

Preparation, training and eating right are the mechanics to completing the century ride. But mental preparation is important too. Hills can be daunting, but know that you have trained and you will get up them. The distance can be long and hard but keep the right attitude “you can do it!”

Best Riding Practice for Cyclists, Stop Pain

Best Riding Practice for Cyclists, Stop Pain

How to Alleviate Neck and Back Pain Caused by Cycling

Combine some simple changes to riding technique with pre and post ride stretching for best riding practice and alleviate back and neck pain suffered by regular cyclists.

Cycling is a great cardiovascular form of exercise but a high percentage of regular cyclists, both professional and recreational, experience recurring back and neck problems.

A study by Wilber et al in 1999 showed that 55% of females and 44% of males suffered neck pain requiring medical treatment after an 8-day recreational cycle tour. In addition, over 30% of riders reported back pain.

Unfortunately, riding for long periods with the spine bent forward causes pain in both the neck and lower back for many cyclists. Correcting poor posture in riding technique and incorporating regular cycling stretches into the training routine can help to alleviate painful symptoms.

Riding Position on a Bicycle

  • Firstly ensure weight is distributed evenly between the hands, the feet and the centre of the body on the saddle.
  • Lean forward over the bike rather than trying to stay upright but do not crouch into a ball.
  • Ensure the back is kept straight when leaning forward rather than curved in an arch.
  • Keep the head, neck and shoulders relaxed and let the legs do the hard work when pedalling.

Riding Techniques to Prevent Back Pain

  • Do not grip the handlebars too tightly. This is common among novices when cycling on rough terrain, especially downhill. Try to relax and keep the arms loose on rough ground rather than absorb the bumps through tensed muscles.
  • Stretch the underused hamstring muscles; actively engage them by raising the heel and pushing downwards slightly on the upward pedal stroke. This action is easier if using toe clips or clipless pedals.
  • When climbing, drop the wrists forward to take pressure off potential strain on the lower back and slide slightly forward on the saddle.
  • On descents, move to the back of the saddle and extend the arms whilst keeping relaxed when encountering rough terrain.
  • Rotate the head from time to time on a long ride and roll the shoulders forward and back to relieve any tension in the spine.
  • If experiencing severe discomfort in the neck or back whilst riding, dismount and stretch out to alleviate the pain.

Stretching Exercises for Cyclists

Pre and post ride stretching should focus on the hamstrings, calves, shoulder muscles and back. Regular practice of some basic cycling stretches together with correct riding posture helps to alleviate common neck and back problems.

Additional Tips for Comfortable Bike Riding

A pair of quality padded cycling shorts is a must for any regular cyclist and prevents constant shifting in the saddle and potential bending of the back in an effort to reduce pain in the backside.

If wearing a hydration pack on long rides, ensure the pack is balanced with the straps tightened fully. A heavy lopsided pack full of water can cause severe pain to the lower back.

Pain Free Cycling

Whether cycling regularly to win or just for pleasure, all regular cyclists can benefit from a close look at their riding technique and stretching regime to avoid pain through cycling overuse.

Yoga Stretching for Cyclists

Yoga Stretching for Cyclists

Yoga Exercises Help Cyclists Maintain Flexibility in Tight Muscles

Yoga stretching is the perfect exercise for cyclists with tight hamstrings and lower back problems caused by long days in the saddle.

Cycling is a healthy activity which builds and maintains muscles, helps to control weight and is gentle on the joints as it is low-impact. Regular riders, however, often suffer from some of the downsides of cycling such as tight hamstrings which are little-used when cycling and lower back problems due to riding in staying in the same place for a long time.

Key Yoga Postures for Cyclists

Yoga stretches or asanas as they are better known are the perfect remedy for curing and preventing such problems and key yoga poses using forward bends and back bends are a great complement for regular cycling activity.

Use a yoga mat or other non-slip mat to perform the poses. Follow the exercises using the pictures below as a guide.

Intense Forward Bend – Uttanasana

Stand upright and, exhaling, bend forward from the waist keeping the legs taut and body weight equal on both feet. Aim to touch the floor and, if possible, place the palms on the floor. Breathe evenly and try to increase the stretch on each out-breath. Hold for one minute.

This intense stretch is wonderful for the hamstrings and spine. Those who find it easy to rest the palms on the floor can increase the stretch still further by placing the hands behind the feet.

Downward Dog – Adhomukha Svanasana

Lie face down with palms by the chest. Exhale, raise the trunk upwards, straighten the arms and move the head towards the floor keeping the heels flat on the ground. Hold for 30–60 seconds.

Performed correctly, this yoga stretch is both exhilarating and re-energizing and stretches the chest, spine and leg muscles.

Upward Dog – Urdhvamukha Svanasana

This is a counter yoga pose to the downward dog allowing the spine to be flexed in the opposite direction. Lie on the floor face down with feet flat and palms by the waist. Inhale and raise the head and trunk, pushing back on the flexed legs without lowering the knees to the floor. Hold for 30 seconds.

This asana stretches the spine, thigh and calves and is a great cure for back problems caused by too many hours in the saddle.

Locust – Salabhasana

An invigorating but challenging backward bend. Lie face down with arms stretched back and palms upward. Exhale and simultaneously lift the head, chest and legs off the floor. Contract the buttocks and hold the pose for 5–8 breaths if possible.

The locust position is excellent for relieving pain in the lumbar region as the spine is stretched backwards. An added benefit is it also relieves flatulence!

Cobra – Bhugangasana

Those who find the Locust pose difficult to hold can try the Cobra or Serpent pose instead. Lie on the floor facing downwards with the hands by the pelvis. Inhale, press the palms down and lift the trunk. Whilst the hands make this back bend easier, the aim is to raise the trunk without relying too much on the hands. The effect on the spine is the same as with the Locust pose.

Maintain Cycling Flexibility Through Yoga Stretching

Regular practice of key yoga positions is an excellent way for cyclists to loosen tight muscles and avoid or alleviate back problems. Choose a high-quality yoga mat to make yoga practice a regular part of an all-round cycling training regime.

How to Use an Advanced Stop Line for Cyclists

How to Use an Advanced Stop Line for Cyclists

Cycling Facilities in the UK, Getting Ahead of the Traffic

Advanced Stop Lines, and Cycle Reservoirs allow cyclists to take up a position ahead of a queue of traffic. However their use is governed by rules that many don’t know.

The Advanced Stop Line, or ASL for short, has been steadily appearing all over the UK in recent years and has been lauded as one of the main safety facilities offered to cyclists on the road. This is quite often true, but in some cases you do have to be careful how you use them, and there are rules on their use (for both cyclists and motorists) that should be borne in mind.

Layout of Advanced Stop Lines and Cycle Reservoirs

The term ‘Advanced’ stop line is a slight misnomer, as in most cases the stop line has stayed where it was, and the stop line for cars has been moved back in order to create a cycle reservoir at a set of traffic lights. The theory is that bikes can take up a position at the head of a queue of traffic stopped at lights, putting them into a visible position so that they can move away first when the lights turn green.

Often the reservoir will have a ‘feeder’ bike lane, usually on the left, but sometimes in other positions depending on the road layout. The stop lines are solid white lines fencing in the cycle reservoir.

Rules for Cars on Where to Stop

The basic rule is that when a light is red the cars have to stop at the first stop line, i.e. they cannot enter the cycle reservoir. There are, however, caveats to this rule. If the lights turn red, but stopping before the first line would be impossible or dangerous, and stopping before the second stop line would be possible and safe, then the driver MUST stop before the second stop line, and will therefore be required to stop within the cycle reservoir.

This will often happen in a slow moving stream of traffic and it is very easy to get caught this way. Something to think about if you ride a bike into a cycle reservoir and aim a scowl at a driver who is stopped there. Of course the number of drivers who simply drive into the cycle reservoir either deliberately or negligently often outweighs those complying with the rules of the road, but if you can’t be sure the scowl should be kept to yourself.

Entrance by Bikes into the Cycle Reservoir

This may sound strange, but in the main bikes are governed by the same rules as cars when it comes to cycle reservoirs. Cyclists can only technically enter the reservoir if there is a feeder bike lane, with a dotted line, which filters into the reservoir. If there isn’t a feeder lane, and just a solid stop line that the cars are stopped at, as a cyclist you are supposed to stop there to.

Of course, common sense dictates that this is a frankly ridiculous situation, as it negates any purpose assigned to the advanced stop line and cycle reservoir. General usage, and logic, therefore means that it’s unlikely anyone will ever be fined or given a talking to for riding into a cycle reservoir without a feeder lane.

Dangers Posed by Advanced Stop Lines

If you are using an advanced stop line you really need to be careful of a number of things. Firstly while filtering past traffic to reach the cycle reservoir you must keep an eye on the lights. If they change to green while you are still filtering, or just reaching the head of traffic, the general rule of assuming the drivers haven’t seen you should always apply. In this case it’s often easier to merge with traffic than try to make a dash for the reservoir.

If you are turning right then cycle reservoirs may have limited use. In order to use them as they are intended you would have to filter on the left, then once at the reservoir ride over to the right hand side. Obviously you can only do this is the lights are red, and even so you should pay very close attention to the possibility of them turning green, which could be disastrous should you be caught out half way across the front of a car.

If the lights are green and you are approaching on the left you will have to stop (possibly impeding cyclists behind you), wait for the lights to turn red, and then make your move over to the right hand side. It’s probably simpler to either merge with a moving queue of traffic on the right, or filter past on the right hand side (which is often the safer option anyway, which is obviously in contradiction to cycle lanes generally being placed on the left hand side of the road by the kerb).

The Benefits of Riding a Fixed Wheel Bicycle

The Benefits of Riding a Fixed Wheel Bicycle

Cycling With One Gear – Singlespeed, Fixed Gear Bike Bonuses

Riding with only one gear and no freewheel might seem like madness, but there are numerous benefits to riding what is known as a ‘fixed wheel’ or ‘fixed gear’ bike.

Riding fixed wheel bicycles has been growing in popularity worldwide in recent years. But just what is fixed wheel riding, and what benefit is there to it?

Fixed wheel means that the bike only has one gear, and no freewheel, so you cannot change to a lower or higher gear, and you cannot coast on the bike. In the US the term ‘Fixed Wheel’ and ‘Fixed Gear’ appear almost interchangeable. In the UK ‘Fixed Gear’ tends to mean a singlespeed bike (i.e. only one gear, but it does have a freewheel).

But what can possibly be the benefits of something that seems so strange?

Maintenance is Kept Simple

Gears are wonderful things, and the derailleurs that control those gears are little pieces of mechanical genius (and in some cases downright beauty). But they can also go wrong. No matter the weather, ride every day, and you’ll find the gears becoming a little clogged, not changing as sweetly, even skipping or jumping in a ‘ghost shift’.

And then what happens if a gear cable snaps, or you bash a derailleur and knock it permanently out of line?

This is where the simplicity of fixed wheel shines. There’s less to clean, and even if you do let the grime build up, a fixed wheel gear will continue to function much more smoothly than a derailleur. The chains are not designed to be flexible sideways (as they don’t have to be pushed up and down cogs) and so tend to be a little stronger as well.

You Will Increase Your Fitness

There are two primary ways in which fixed wheel cycling may improve your fitness.

Take away the option of a lower gear when you are going uphill and you just have to get on with the job in hand. This will benefit your leg strength, as well as giving you more of a cardiovascular workout; and

Without a freewheel coming down hills you are forced to spin your legs, or slow down. If you spin you will be improving your flexibility, as well as keeping yourself warmed up (with a freewheel you stop pedalling and your muscles relax and cool). This can actually also go some way to limiting the chance of injury (pulled muscle or the like) while cycling.

The Aesthetics are Improved

A bike shorn of a front and rear derailleur will just look better. It’s uncluttered, and can really show off a nice frame perfectly. It can even make an ordinary frame look better, just by making it look slimmer, more athletic. And it should feel slimmer as well. All of those gears can weigh quite a lot.

What this does is let you see the bike, rather than an overpowering amount of paraphernalia. In fashion it may be all about the accessories, not so with fixed wheel bikes (unless of course you count the coloured rims, flash bars, fancy tyres etc. – okay, maybe it is all about the accessories).

You Will Feel ‘At One’ With the Bike

There are certain fixed wheel riders who will also put forward a theory that fixed wheel riding feels more ‘connected’ with the bike. It’s certainly true that the direct correlation between your pedal stroke and the movement of the back wheel, without any chain loops or freewheel, means that you can see what the bike is doing better.

Whether it improves your ‘feel’ and so your control of the bike is entirely up to personal interpretation when you ride.

How to Choose a Tag Along Bicycle

How to Choose a Tag Along Bicycle

Advice on Buying a Trailer Bike for Cycling with Children

A tag along is a specialty bike offering safe cycling for young children via secure attachment to an adult bicycle. Here are some tips for selecting a tag along.

Young children usually learn to ride a bicycle using stabilizers, eventually losing the training wheels when they get confident with balance. Whilst they then progress to riding short distances or playing in the back yard, most young children tire or get bored very easily making it difficult to plan a family day out using ordinary bicycles.

Tag alongs, otherwise known as trailer bikes, offer a unique way for the whole family to enjoy several hours in the saddle. The parent does most of the hard work whilst the child has fun learning to pedal and change gear or simply enjoying the ride at the back. Read on for how to choose the best tag along for your needs.

What to Look For in a Trailer Bike

Basic models come with no gears and a maximum weight restriction of around 36kg or 80lb. Prices start at around $130/£80 but rise to over $500/£300. The following are things to look for:

  • Foldability – very important for transportation.
  • Alloy wheels which won’t rust.
  • Robustness of the attachment mechanism and frame. High quality brands like Burley have a special carrier rack with a unique hitch system for added safety.
  • Spare attachment brackets to allow different bikes to be used for pulling.
  • Gears – only really required for 5-10 year old kids as smaller children won’t really use them.
  • Suspension seat posts for added comfort over bumps bearing in mind the child won’t see them coming!
  • Safety flags to warn there is a small rider at the back; these are usually included but it’s worth buying a spare.
  • The tag along is quick and easy to put on and take off.
  • Stability of the trailer bike. Basic models may not offer adequate stability especially for heavier children.

Consider how often the trailer bike is likely to be used before buying an expensive model. They are best suited to dry conditions so there is little point in buying a top of the range bicycle if it usually rains. A better option in this case would be a child trailer where little Johnny is enclosed in his own enclosed buggy pulled along behind the bike.

Which Kids Bike Trailer Brand?

There are many niche brands on the market but better known names include: Burley, US industry leader making high quality trailer bikes and child “buggy” trailers; Adams with their trademark trail-a-bike whose range even includes a tandem trailer for carrying two small children at once; Roland and Avenir.

Tips on Cycling with a Tag Along

  • Always make the child wear a helmet and, if riding at night, put lights everywhere especially on the rear of the child’s helmet.
  • The long length of the tag along attached to a normal bike makes it difficult to negotiate tight bends and get through gates so extra care is required.
  • A mountain bike is the best option for the host bike as it offers greater stability than a lighter road bike.
  • When planning a day out, check the terrain and likely gradients as it can be exhausting pulling an extra 40-50kg on a steep hill.
  • Take extra care going downhill as stopping distances will be longer due to the additional weight being “carried.” Most bike trailer brands recommend cycling at a maximum speed of 16mph even on flat terrain.

Buying a Trailer Bike

If looking for a safe way to cycle with young children, consider buying a tag along. Determine how often the bike is likely to be used, how robust it needs to be for the intended terrain and whether the child is old enough to practice gear changing. Then choose between a budget bike trailer costing around $120 or a higher spec bike offering multiple gears and even brakes.

Trailer Bikes for Children with Special Needs

Trailer Bikes for Children with Special Needs

Tag Along Bicycles for Disabled Children and Adults

Children and adults with special needs can enjoy the fun of cycling by riding a trailer bike specifically designed for disabled people who cannot cycle on their own.

Trailer bikes are essentially the rear portion of a bicycle. Also known as tagalongs, they are popular with families, allowing parents to take their kids out for the day without having to worry about whether they will get tired.

Most bike trailers are designed for small children with a weight limit of 80 lb/36 kg. This restricts their use for older heavier kids and people with special needs or disabilities.

Fortunately there is now a solution which allows disabled people of any age to enjoy the thrill of cycling.

Caboose Trailer Bike

The Caboose is a two wheel trailer bike manufactured by Morgan Cycle, specialists in beautifully designed retro bikes, trikes and scooters for children. Not only does this unique “trike” offer increased stability for those with special needs, the two models available can both take a person weighing up to 200 lb/90 kg.

Features of the Caboose Bike Trailer

  • Two models available, the Caboose 20 suitable for 5-10 year olds up to 26” inside leg and the Caboose 26 suitable for riders up to a 33” inside leg.
  • Sturdy high-carbon quality steel frame construction for durability.
  • Specially designed quick release hitch attachment is safe and easy to use.
  • Folds to 46″L x 23″W x 24″H for compact storage; wheels can be removed for very tight spaces.
  • Quality wheels with full bearings ensure a smooth ride.
  • Padded sprung seat for comfort.
  • Storage rack incorporated into the design allows luggage to be carried.
  • Quick and easy to assemble and simple to maneuver despite being 70” long.
  • A seatback is available to offer the rider additional comfort and stability.

Cycling Gives Joy to Special Needs Children and Adults

The stability of a two wheeled trailer bike allows those with disabilities to experience the thrill of cycling without the need to steer, maintain balance or even see where the bike is going. Traditional one-wheeled tag alongs can sway from side to side under certain conditions so the added stability of two wheels removes any potential fear allowing the rider to simply enjoy the ride.

Where to Buy a Trailer Bike for the Disabled

This high quality unique bike trailer is well priced at only $299.99 (+ $30 for the larger model) and is available online from Pedal Cars and Retro Collectibles with free shipping in the US. Customers in Canada, Alaska and Hawaii can order the Caboose for an additional shipping charge.

Tag Along Bicycles for Handicapped People

The Caboose is an innovative product giving those with special needs the freedom to enjoy the joys of cycling that would otherwise be unavailable. Whilst pulling one with a 200lb passenger on board may be demanding, every pedal stroke is sure to put an enormous smile on the rider’s face.

Summarize

Trailer bikes are essentially the rear portion of a bicycle. Also known as tagalongs, they are popular with families. Caboose is a two wheel trailer bike manufactured by Morgan Cycle. Two models available can both take a person weighing up to 200 lb/90 kg. The Caboose is an innovative product giving those with special needs the freedom to enjoy the joys of cycling that would otherwise be unavailable. The stability of a two wheeled trailer bike allows those with disabilities to experience the thrill of cycling without the need to steer, maintain balance or even see where the bike is going.

Which Type of Bike for Cycling with Children?

Which Type of Bike for Cycling with Children?

Should it be a Trailer Bike, a Child Trailer or a Child Bike Seat?

Active parents can enjoy all day cycling with the kids using either a child trailer, a tag along or a child’s bike seat. Here’s some advice on which to choose.

Keen cyclists with young children have a wealth of products to choose from if they want to spend time in the saddle without worrying about whether the kids will get tired and spoil the fun. They can carry them in a child seat or pull them along behind their own bike either in a buggy or on a trailer bike.

There are pro and cons to each type of “bike” but the buying decision will come down to what type of riding the parents want to do, where they live and how old and/or heavy their children actually are.

Child Bike Seats

A bike seat for a child can be put on the rear or the front of a bike and is a great bike accessory to carry young children between 6 months and three years old up to a maximum weight of 40lb/18kg. With prices starting at around $80 they are an economical way of cycling with a small child but the biggest drawback to using a baby bike seat is that it can make your bike unstable, particularly with a hyperactive child.

Whilst strong safety harnesses keep the child firmly seated, side to side movements by the child force many parents to take their attention off the road which can compromise safety. For that reason, a child trailer pulled along behind the bike may be preferable.

Child Trailers

These are great little buggies pulled behind the host bike and have multiple uses as they can carry the kids and/or the shopping or even the family pet! With prices from $200, they do cost more than a bike seat but they can carry 2 small children plus the shopping and re-sale values are good.

A child trailer can cope with weights up to 100lb/45kg and, whilst they can be a little unwieldy on corners due to their length trailing behind the bike, they don’t affect bike handling. The kids can stay warm and dry in their own “bike” buggy and there are cool accessories like animal covers available from innovative brands such as Burley to keep the kids smiling while the parent exercises.

Tag Along Bicycles

Older children soon want to ride their own bikes but kids under 10 can get tired or bored easily, limiting the length of time parents can stay out on their bikes with them. Tag along bicycles which attach to an adult bike are the perfect solution and are great for teaching basic road safety and pedaling skills; they also allow the child to do some of the hard work as pulling a load of up to 70kg (bike plus child) can be pretty tiring!

Prices start from an affordable $80. The one drawback with a trailer bike is that they can really only be used in fair weather as the poor child can get very dirty in muddy conditions.

Choice of Bike for Cycling with Kids

child bike seat may be preferable for young children up to 40lb in weight though a child trailer can be used for both babies and older kids up to 100lb. Neither encourage children to exercise, however, so a tag along may be the perfect solution for longer days in the saddle with the family in tow.