Exclusive Content:

Best Riding Practice for Cyclists, Stop Pain

How to Alleviate Neck and Back Pain Caused by...

How I Became a Folding Bike Convert on a Dahon

Being a bit of a bike snob, I was...

How to Ride a Tandem Bicycle, a Two-Seater Bike

Advice on Learning the Basic Techniques of Twin Tandem...
Home Blog Page 3

Biking the Whistle Stop Trail in Maine

Biking the Whistle Stop Trail in Maine

A Multi-use Trail That Offers Year-round Fitness Opportunities

This pleasing trail through the countryside of Maine’s western foothills beckons cyclists, hikers, and equestrians, as well as snow sport enthusiasts. Pack a camera!

The Whistle Stop Trail in Maine stretches for 14 miles between Farmington and Jay, where the main trailheads are located. Other entry points exist, but the most accessible spot is the Farmington trailhead, with its well-placed sign and large parking lot. The route was created from the rail bed of the former Maine Central Railroad.

The Whistle Stop Trail Rolls Through Maine’s Western Foothills

This multi-use trail appeals to a wide range of outdoor enthusiasts for both motorized and non-motorized use:

  • off-road biking (mountain or hybrid types)
  • hiking
  • horseback riding
  • dog walking (on leash)
  • snowmobiling and ATV-ing
  • snowshoeing
  • cross-country skiing.

The route is relatively flat and winds through a number of interesting environs: forests, brooks and streams (spanned by attractive wooden bridges), wetlands (including a beaver lodge), farms, and hay meadows. It also runs near the backyards of residential areas, and a section parallels Routes 2/4, a heavily traveled road.

The Whistle Stop Trail (also called the Farmington-Jay Multi-use Trail or Rail Trail) is managed by the Maine Department of Conservation in conjunction with area recreational groups. The path is public and free to use. There is no lighting along the route. It is not plowed during the winter, making it a great corridor for snowshoeing and cross-country skiing (remember that ATVs and snowmobiles share the same route).

Off-road Biking Tips for the Whistle Stop Trail

The Jay end of the Whistle Stop Trail tends to be extremely soft, sandy, and rutted – somewhat frustrating for biking enthusiasts. The Department of Conservation and local interested groups are partnering in resurfacing this section. Also be alert to the rough decking of some of the wooden bridges on this route.

The surface of the Farmington end of the trail is a packed gravel double track and is in good condition. The trailhead in Farmington is easy to find and has ample parking. All good reasons to bike from the Farmington end of the trail.

Travel to West Farmington on Routes 2/4 and take Route 143 at the stoplight adjacent to the bridge over the Sandy River (just west of downtown Farmington and the University of Farmington campus). Travel a short distance to a four-way stop and turn left, then turn right onto Farmers Lane at the Whistle StopTrail sign. Drive about 100 yards on a narrow driveway to a large gravel parking lot on the right. Park here and gear up.

Because a significant portion of the route is within the forest canopy, fall foliage season (mid-September to mid-October) is an eye-catching time to bike it. The weather is also cooler, and insect season is largely over. Plenty of photo ops!

Not far from the Farmington trailhead is a warming hut (a small yurt) that is maintained by nearby Franklin Memorial Hospital. It’s available to all and is especially nice in winter and on cold spring/fall days. The hospital is about 1/4 mile away and offers restrooms and a cafeteria for those who failed to bring food and drinks with them. The nice folks at Franklin Memorial have also erected fitness instruction posters in this area for local exercisers.

For both tourists and local inhabitants, the Whistle Stop Trail provides an excellent opportunity for outdoor exercise. Whether hiked, biked, skied, or snowshoed, make it part of an enjoyable day’s outing in the western Maine foothills.
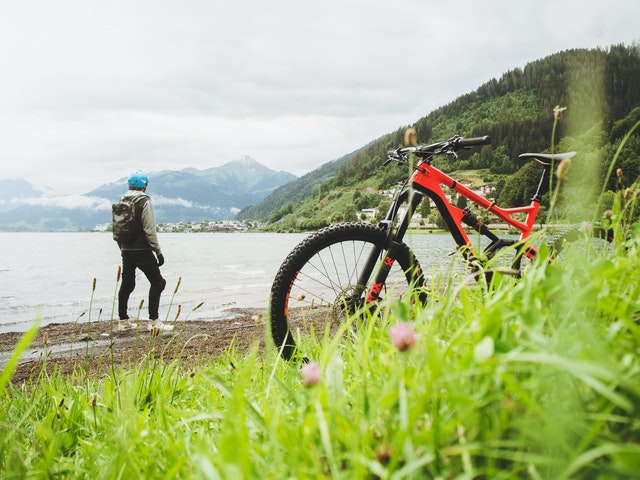
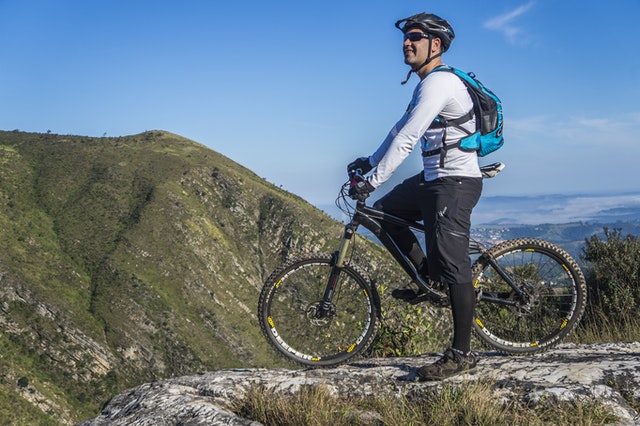
 

Four Corners Mountain Biking

Four Corners Mountain Biking

The Best of the Southwest’s Fat Tire Trails

The Four Corners: Colorado, New Mexico, Arizona and Utah come together to provide some of the best trails in the country all within a day’s drive, so get ready to ride.

It is easy to find good trails in Four Corners Country, from high alpine mountains to the red rock canyon country, there are numerous trails that provide miles of fun, and a few classics are must dos for those just passing through, or staying for some fun.

The Colorado Trail, Durango Colorado

Beginning in Durango and stretching all the way to Denver, the Colorado Trail crosses every kind of Rocky Mountain Terrain imaginable. From roaring rivers and streams, to waterfalls under alpine peaks, to high tundra with see forever views, this trail has it all.

There are many good options of riding the trail in short sections, and many start near town, but the higher you go, the more you’ll be rewarded with bending singletrack far above treeline and million dollar views of towering peaks and mountain lakes.

Good access point for the Colorado Trail are Junction Creek, Kennebec Pass, Molas Pass and Bolem Pass. It’s hard to go wrong on this popular classic.

Hermosa Creek Trail, Durango, ColoradoHow does over twenty miles of epic singletrack sound? For deep ancient forests and amazing mountain biking that twists, turns, drops and climbs, this is the trail to ride. Beginning nine miles behind Durango Mountain Resort, Hermosa Creek Trail offers a day’s worth of sensational pedling, following the creek for a cascade down a pristine valley floor, and ends in Hermosa, just ten miles north of Durango. This well known trail sees plenty of traffic, so get in the saddle early and don’t miss the wildflower season.

Phil’s World, Cortez, Colorado

In the shadow of Durango mountain biking lies Cortez, famous for Mesa Vedre National Park. But the trails directly across from the park are putting this town on the mountain biking map. With over twenty-five miles of rollercoaster trails, riders grin from ear to ear after sections like Yoda, or Bob’s or the notorious Rib Cage, where inertia has its way with two wheels, sending them sailing down steeps and floating up ravines. Phil’s World is gaining popularity as an early and late season destination due to its dry climate and desert conditions. This trail selection will be remembered by all who ride there

Alien Run, Aztec, New Mexico

New Mexico’s other Roswell, Aztec is celebrated for two things: an alleged alien space craft landing there in the 1940s, and the killer singletrack that takes you to the site. Mountain Bikers flock here in spring and fall to get out of the mountains and into the desert landscape, with slickrock sections, ledgy staircases and twirling turns that keep them on their toes. Nine miles of great riding almost all year round can be enjoyed in this up and coming area. New terrain like Area 51 is added every year, and the locals have plans for more. A plaque marks the site of the spot that many say an alien ship crash landed, becoming part of a secret government cover-up. What ever the case, Aztec is terrific fun for mountain biking.

Porcupine Rim, Moab, Utah

This all-time classic ride is a flat out adrenaline junkie’s dream come true. With challenging climbing, unforgettable views and enough downhill to rattle even the most plush full suspension, Porcupine Rim offers the best of Moab, Utah. The rides climbs a technical old mining road to an overlook of Castle Valley, then descends another old road for miles before dropping off the mesa and into the Colorado River corridor. Hang on tight, because this one will challenge every skill a mountain biker has.

The above mentioned trails are juat a few honorable mentions. In the southwest great riding abounds, and it’s hard not to find outstanding views, challeging fun and memorable trails, from sandy washes lined with desert towers and sandstone playgounds, to alpine mountains and damp forested singletrack. Spending a little time in the Four Corners will reward you with it all.

How to Climb Hills with Ease on a Mountain Bike

How to Climb Hills with Ease on a Mountain Bike

Bicycle Hill Climbing Technique Tips for Off Road Cycle Trails

Climbing hills on a mountain bike can be tough especially on steep terrain, but practice, the right hill climbing technique and willpower can make the task much easier.

Many people are put off mountain biking because they think they can’t climb hills. While a 600m hill climb may seem impossible for a beginner cyclist, the marvels of modern multi-gear bike technology coupled with a little practice make a big difference.

This article offers tips on the correct hill climbing technique to conquer almost any hill with relative ease.

The First Mountain Bike Hill Climb

Mountain bike beginners almost always find it tough when it comes to that first hill climb. Aside from cycling fitness and bike stamina, common errors include being in too high a gear and incorrect distribution of body weight which forces the front wheel to lift off the ground on a steep hill.

The first trick is to pick a hill that is not too steep. Choose a climb with a gentle gradient no longer than 100m in length and practice gear changing at least 10 -15 meters before the hill takes effect. Stay in the saddle throughout and ride the hill up and down several times until it feels easy.

Hill Climbing Technique

Now it’s time to try something a little steeper. Find a more difficult track with a smooth surface (forest trails or fire roads are a good choice) and use the following tips to practice the best hill climbing technique:

  • Get some speed up before starting the hill.
  • Change down several gears while gathering speed; this may mean the pedals start to spin until the bike reaches the beginning of the hill.
  • Stay balanced and relaxed and remember to breathe deeply.
  • At the start of the climb, try not to stand up. Many riders do this in order to increase pedal power when they are probably in too high a gear to comfortably tackle the hill climb. If the hill is short, standing up may be fine, but it is not sustainable on a long climb.
  • Shift body weight forward by moving to the front of the saddle; this will prevent the front wheel lifting especially if the gradient starts to increase.
  • Change down a gear or two if necessary to make the climb easier.
  • Once near the brow of the hill, make an effort to accelerate for that final push to the top.
  • Take a breather once at the top and look back to see how far you have come – it’s always a good feeling.

Long Hill Climbs on a Mountain Bike

That initial hill may only be a hundred meters long but it is possible to climb mountains with a lot of practice and self-belief. Once the correct climbing technique is mastered, lack of willpower is probably the biggest factor that prevents riders from conquering major climbs of 1000m plus.

Practice is key and that means getting out regularly on the trails to ride different gradients and different types of terrain. Remember that unlike road cycling, where the cyclist can quickly learn to ride at a set cadence, mountain biking requires the rider to climb on constantly changing terrain, upsetting the natural pedaling rhythm. For this reason, while learning, it’s a good idea to stick to fairly smooth long trails to build stamina for tackling the lumps and bumps at a later stage.

Tips to Help with Hill Climbing on a Bicycle

  • Consider riding in clipless bike pedals for increased power on the upward pedal stroke.
  • Drop the wrists and elbows down to help with forward weight distribution.
  • Remember to hydrate on a long hill climb; use a camelback for easy drinking on the move.
  • If the heart beats too fast, slow down or stop. Pushing is always an option or just descend back down and try the hill climb next time round.

Make Hill Climbs Look Easy

Practice and willpower together with good climbing technique can make steep hill climbs look easy. Remember to begin modestly and expand progressively Before you know it, that first impossible hill will feel like a breeze.

Trail and Mountain Biking With a Dog

Trail and Mountain Biking With a Dog

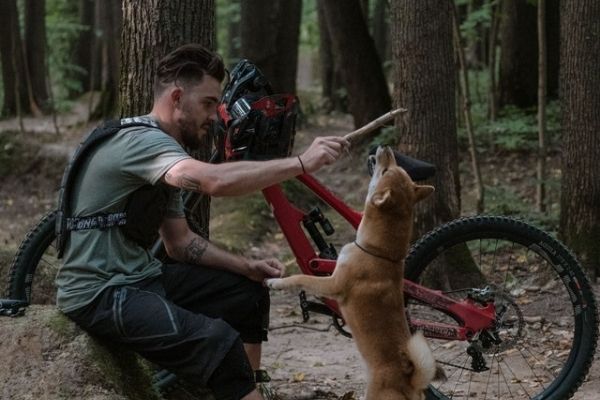
Mountain biking, trail riding, or off-road biking are fun ways to get exercise and enjoy being outdoors. Bringing your dog makes it even more rewarding!

Exercising just for the sake of exercising can be a boring, tedious task. Nevertheless, we all need it to achieve optimal health. There are many benefits: weight control, heart health, muscle tone, lung capacity, and release of endorphins into the brain. All of these same benefits apply to your dog, so why not enjoy a way for both of you to exercise together?

Dogs are Pack Animals

Dogs are pack animals. You should be seen as the pack leader. It is their nature to want to be with their pack and follow the pack leader. Dogs also need exercise, just like we do, only they can move faster and go farther than we can. It is difficult for humans to be able to physically challenge a dog. Most dogs thrive on challenge, both mentally and physically. A fun, challenging romp through the woods can fulfill both people and dogs in many ways!

If you already enjoy trail biking or mountain biking, or off-road biking, then it is easy to incorporate your dog into your ride. It is up to you to know if your dog has what it takes to go on a trail run, though. Some dogs are not physically able, due to their size or age. It is advisable to ask a vet about a dog’s readiness before embarking on such an adventure.

Hydrate Your Dog

Dogs do not have an efficient cooling system, and this is one of the most important things to keep in mind. The human body is very adept at controlling its temperature so long as it has an adequate supply of water. A dog needs plenty of water, too, more than you do! Do not bring your dog if you cannot bring enough water for him, since overheating can be fatal. The only way to carry enough water is to use a hydration pack. They come with a plastic bladder that can hold about 100 ounces of water. It fits on your back, and it has a tube to drink from. You can supplement your water supply by bringing a bottle or two and putting them in bottle cages on your bike. There are also different types of hydration packs, and some of them can carry two bladders (see photo).

Know Your Dog

Know your dog before you go! Be sure that your dog will listen to your commands and that she will stay with you. She must be up-to-date on her shots, and must have a sturdy collar with ID tags and rabies tag. Ideally, dogs should be micro-chipped so they can be identified and reunited with you should they get lost or lose their collar or tags. Always carry a leash with you; it can be easily stowed in a hydration pack.

Be a Pack Leader

The first time you go, begin training your dog to run behind you. In crowded, more urban settings, your dog could cause another biker to crash if she is running ahead on the trail. Take it slow the first time, too, stopping often to rest and offer water. Slowly introduce the dog to longer and longer rides. As a general guideline, you should restrict your trips with your dog to the quantity of water you can carry.

After the ride, you both will reap the rewards of increased endorphins, being in great physical shape, and the joy of companionship and camaraderie

How to Prevent Punctures when Mountain Biking Off Road

How to Prevent Punctures when Mountain Biking Off Road

Tips on avoiding flat tyres when mountain biking on rough trails. Learn how to prevent punctures using tyre sealant, correct tyre pressure and other tricks.

Are you tired of getting regular flat tyres that take time to fix and spoil your mountain biking fun time? Punctures are almost inevitable from time to time if you regularly ride off-road on rough terrain, but they can also be minimized using a few simple tricks.

Avoiding a Punctured Tyre

Mountain bikers who experience punctures on a regular basis need to work out why they are so frequent. Do they happen mainly on certain types of terrain, for instance on rocky trails with sharp stones or dry, and potentially thorny, countryside trails? Do they mostly occur when jumping over objects, in which case it could be down to style of riding? What kind of punctures are the most frequent? Pinch flats, also known as “snake-bites” leave tell-tale twin tears in the inner tube, whereas punctures caused by sharp objects on the trail generally leave a small hole, often in both tyre and inner tube.

Once the reason for the abrasion has been determined, you can then look at the various preventative measures below.

Use Slime Inner Tubes

Tyre sealants from companies like Slime and Dr Sludge are essential for mountain bikers riding in hot dry countries where thorns from trailside thistles are the norm. Available both as pre-filled Slime inner tubes and in a bottle to insert directly into an existing tube, the sealant fills small holes up to 3mm wide and, while the tyre may initially deflate, a quick pump and spin of the wheel usually gets you straight back on the trail.

Tyre sealant is also available in gallon-sized tubs, a cost effective solution for keen riders with multiple bikes or for bike hire companies.

Correct Tyre Pressure

Many mountain bikers like to ride with low pressure in their tyres in order to get better contact between bike and terrain. But this can also lead to pinch flat punctures, especially when jumping or doing drop-offs as the under-inflated tube presses against the wheel rim.

The correct tyre pressure will depend on rider weight and riding style, but consider putting extra air in your tyres if you are getting regular pinch flats.

Additional Tips for Preventing Punctures Off-Road

Use these extra tips to minimize any time spent on puncture repairs:

  • Check tyres after every ride to look for sharp objects and thorns; this is also a good opportunity to look at the tyres themselves for any wear or weaknesses that may allow sharp objects easier access to the inner tube.
  • Use an additional layer of rim tape for extra protection from spiky objects or line your tyres with an extra layer of rubber – grab an old inner tube, cut it in half lengthways and then trim it to fit inside the tyre between the wheel rim and the inner tube.
  • Consider buying better quality tyres, especially ones that are reinforced to withstand rough, puncture-prone terrain. While good quality tyres can be expensive, the cost of buying dozens of spare inner tubes soon mounts up and there are only so many times you can patch a tube!
  • If you do get a puncture on the trail, make sure you check inside the tyre wall carefully for any tiny thorns or objects before inserting a new inner tube.

Keep Mountain Biking not Fixing Punctures

Prevent constant flat tyres by understanding the main reasons for getting them, and then use tyre sealants or extra rim protection as well as correct tyre pressure to minimize time spent on puncture repair.

If all else fails, simply avoid riding in areas prone to multiple punctures at certain times of year and make sure you know how to fix a flat tyre fast.